Overview
This guide walks you through connecting ChatGPT to your Gate22 unified MCP server.Prerequisites
Before starting, ensure you have:- A ChatGPT Plus or Pro account
- A Gate22 account with at least one configured MCP bundle
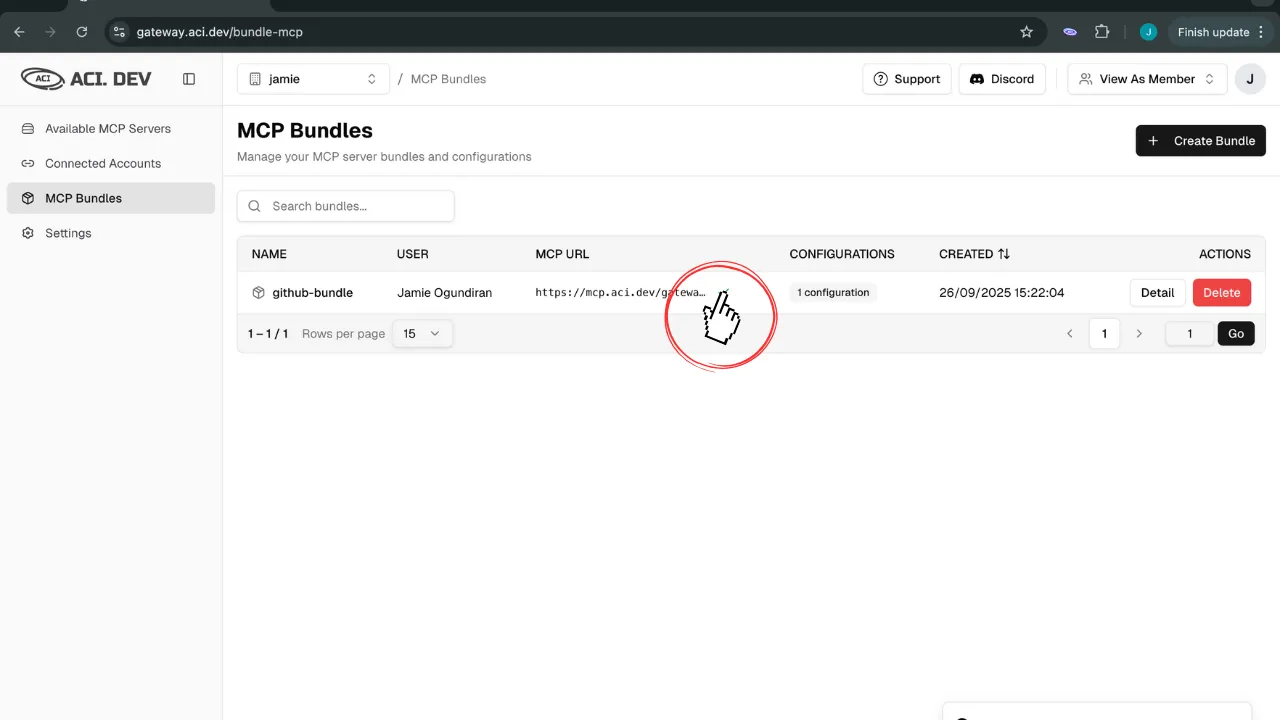
Step 1: Get Your MCP Bundle URL
- Navigate to your MCP Bundles in the Gate22 dashboard
- Click on the bundle you want to connect
- Copy the MCP URL displayed
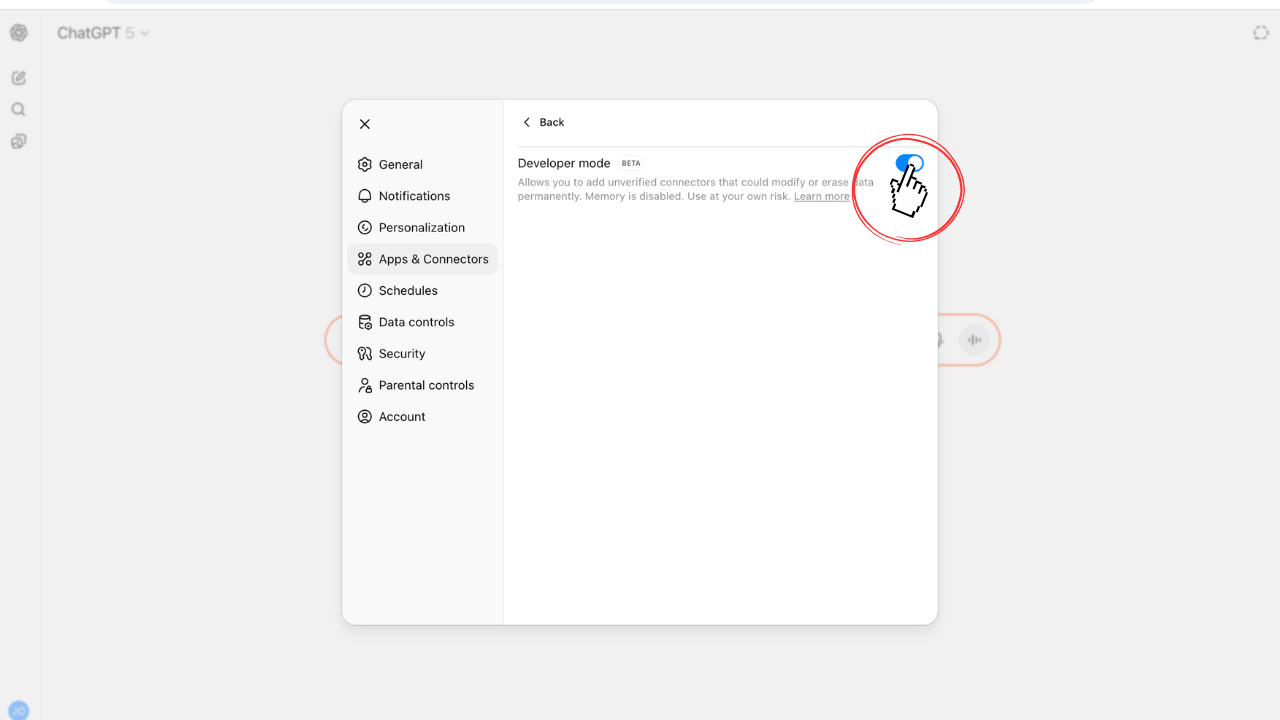
Step 2: Enable Developer Mode in ChatGPT
- Click on your account icon (bottom left) → Settings → Connectors
- Scroll down to find “Advanced settings”
- Enable “Developer mode”
Step 3: Connect to Gate22
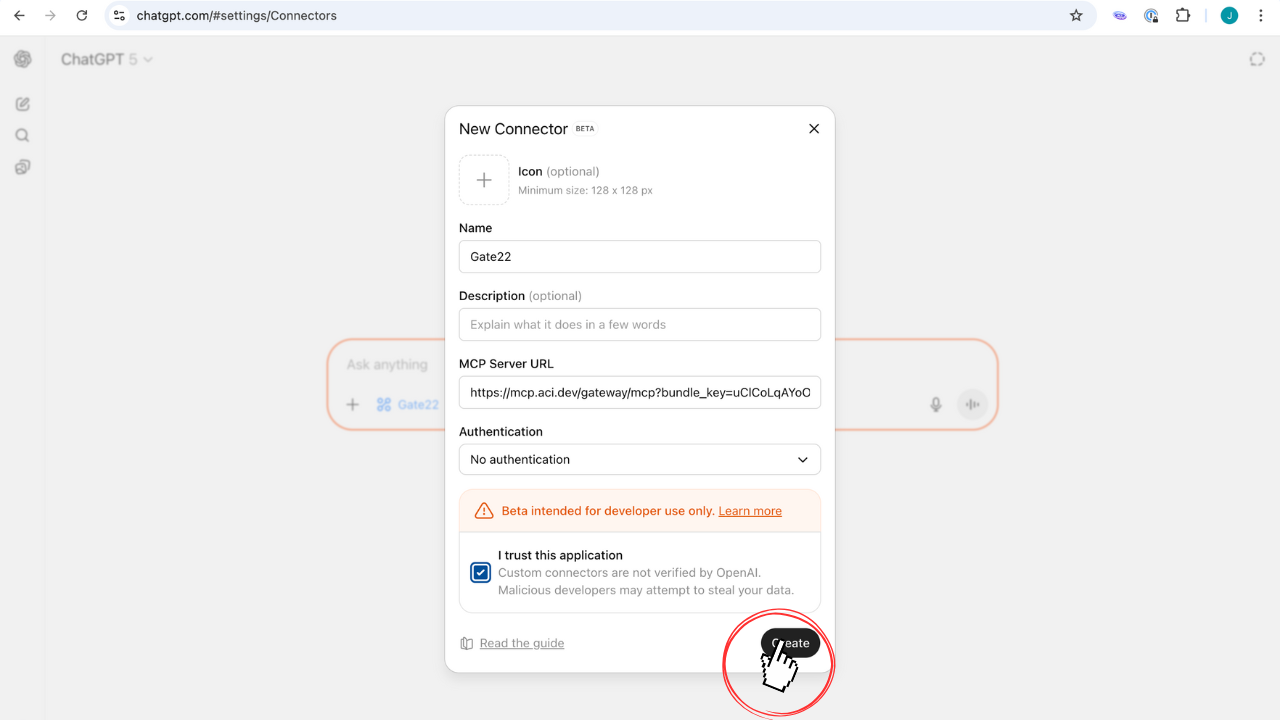
- Return to the Connectors page and click “Create”
- Configure the MCP server:
- Name: Provide a name for your MCP server (e.g., “Gate22”)
- MCP URL: Paste the Gate22 bundle URL you copied in Step 1
- Authentication: Leave as “No Authentication”
- Check: “I trust this application”
- Click “Create”
Step 4: Test the Connection
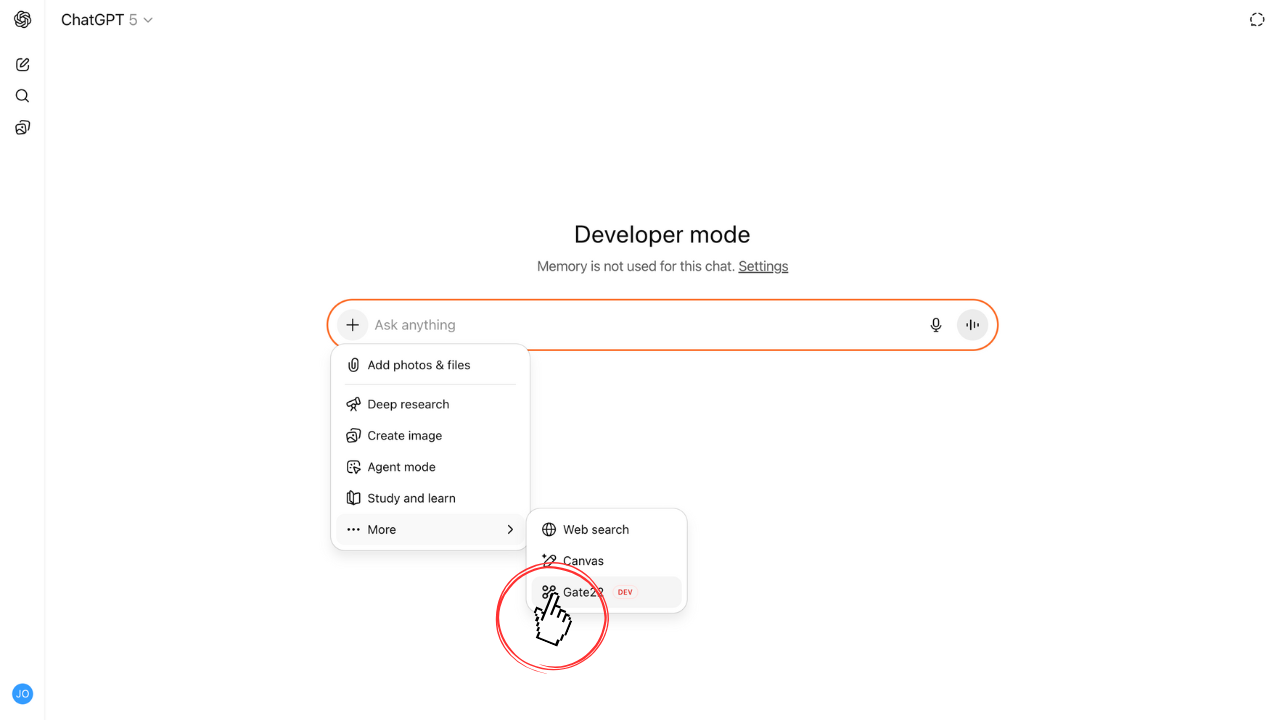
- Start a new chat in ChatGPT
- Add your Gate22 connector
- Ask ChatGPT:
- Verify the response matches your expectations.